Top 5 operating systems for Ethical hacking and penetration testing

A hacker is a highly skilled computer operator who uses bugs and exploits to break into computer systems and networks. An ethical hacker, on the other hand, identifies vulnerabilities in computer systems and networks, and plugs these holes. Here’s a round-up of the ten best operating systems for ethical hackers and penetration testers.
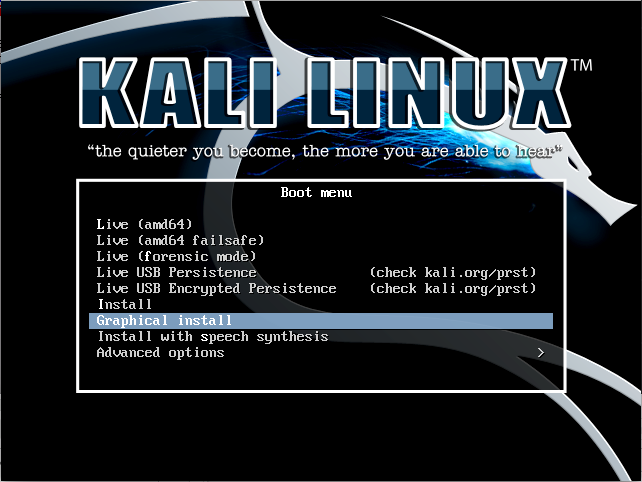
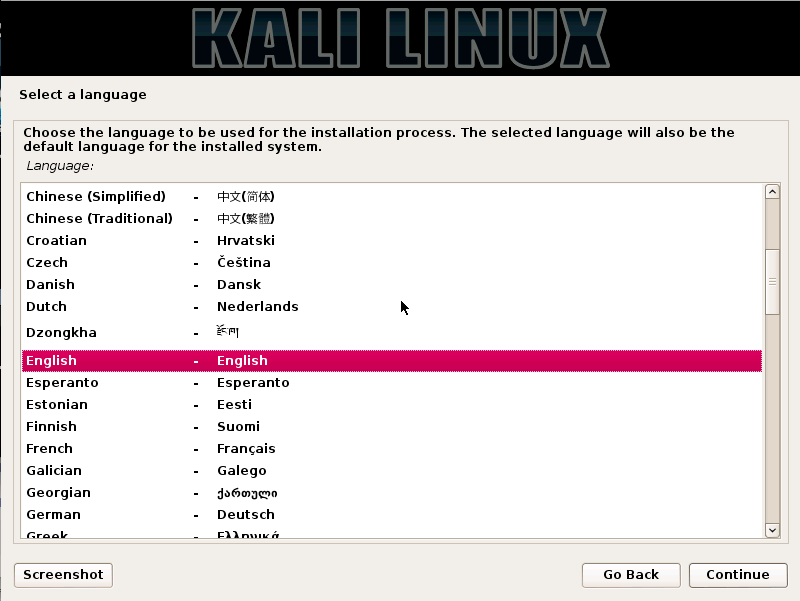
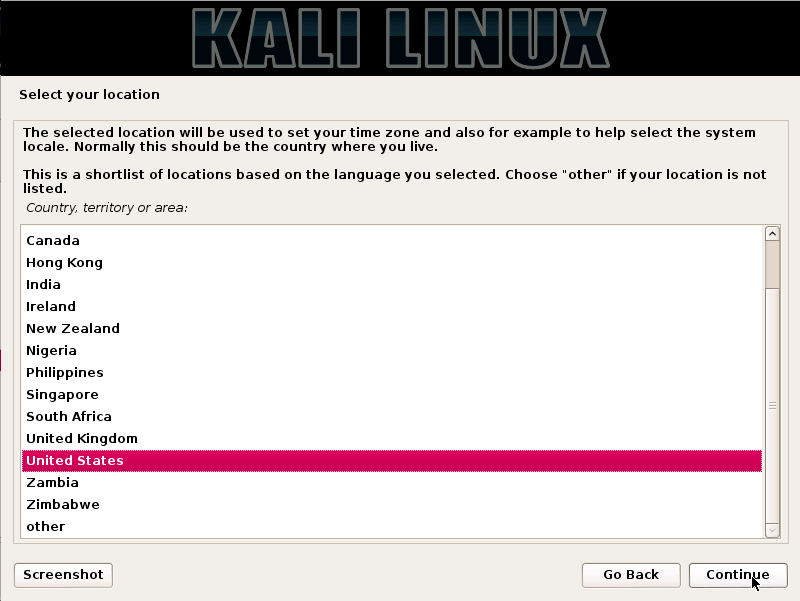
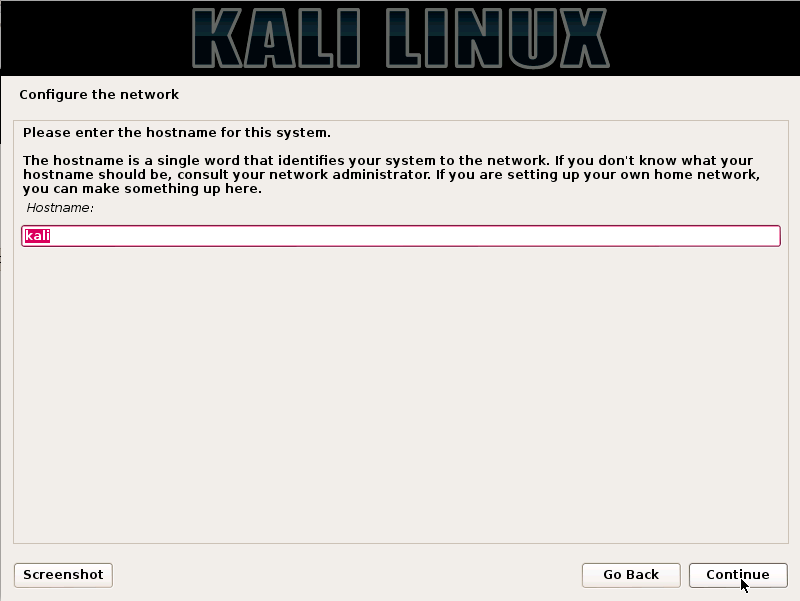
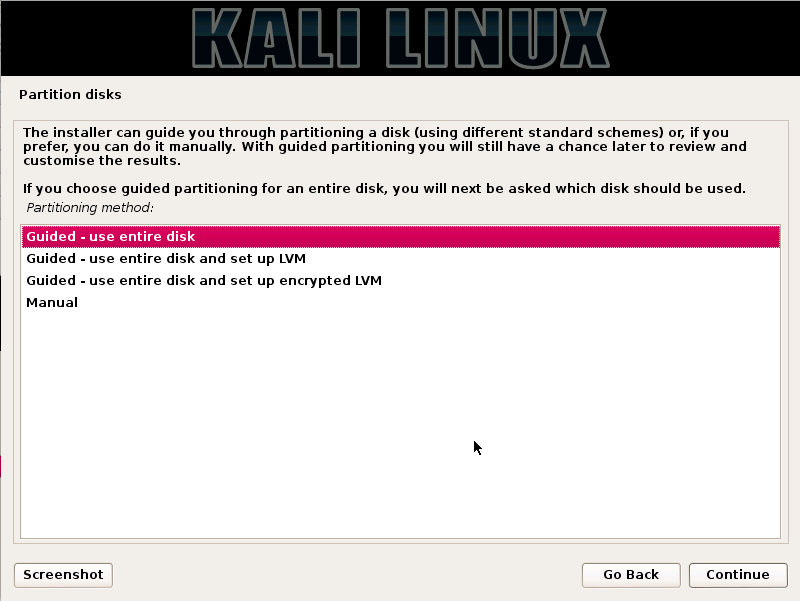
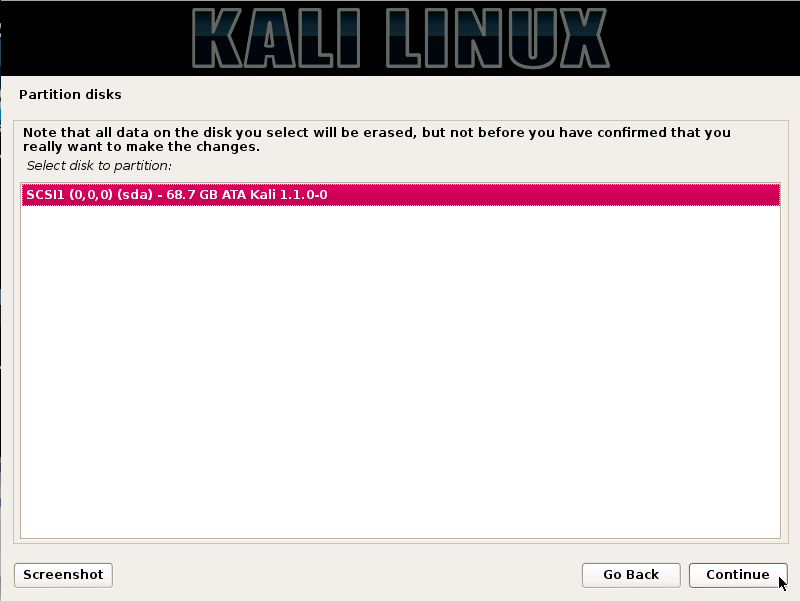
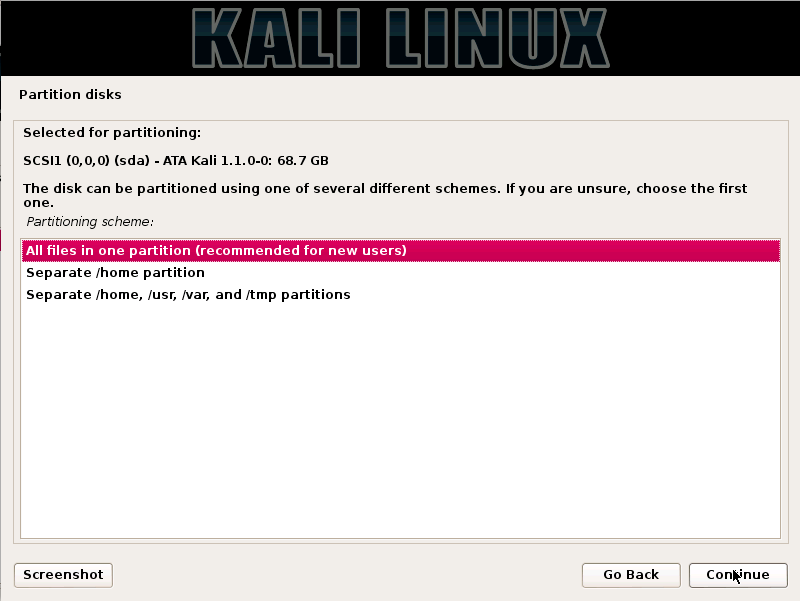
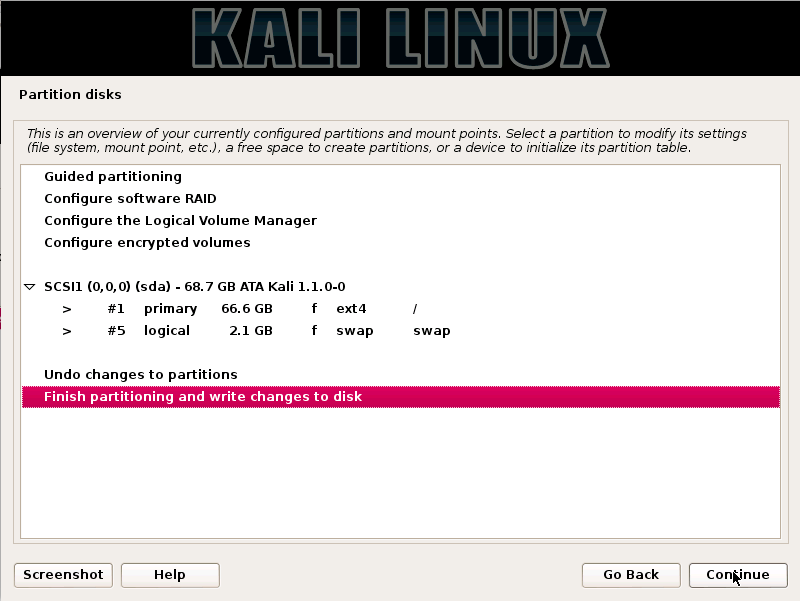
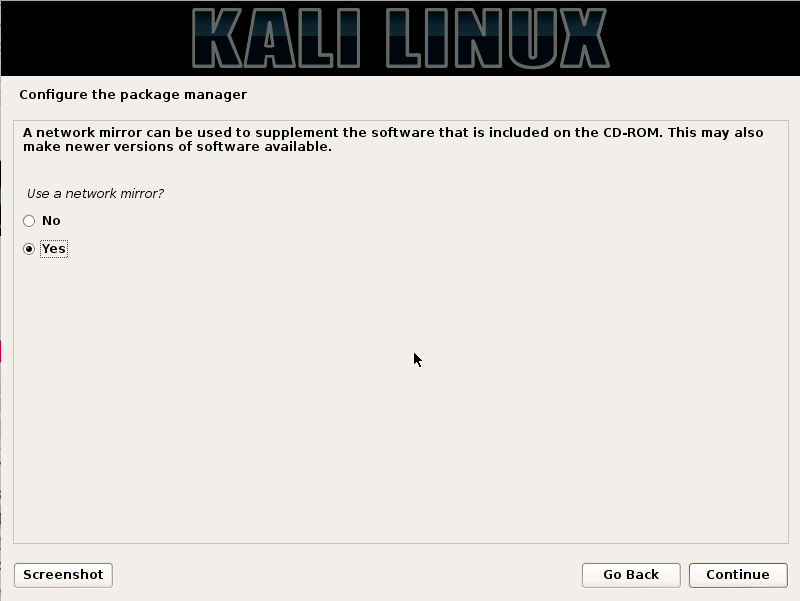
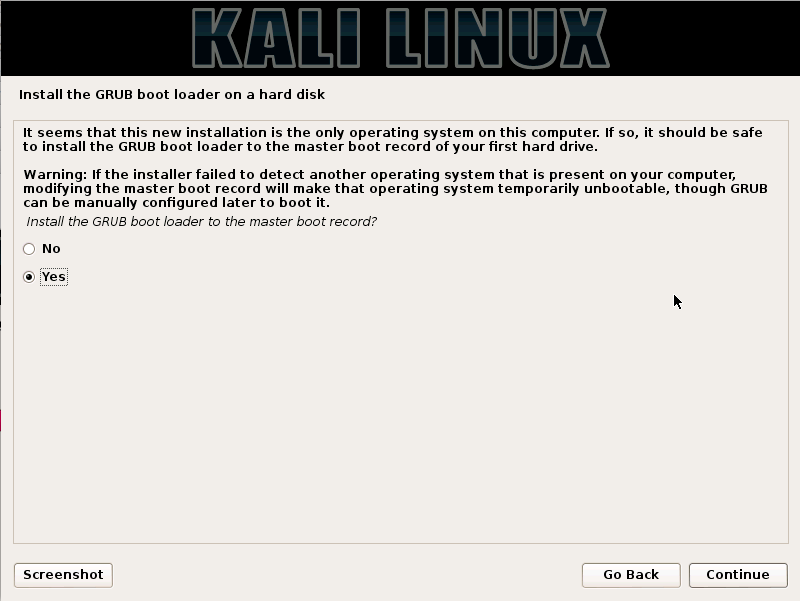
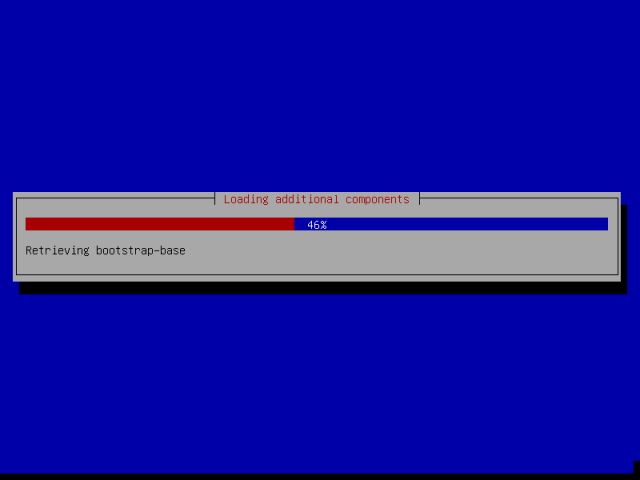
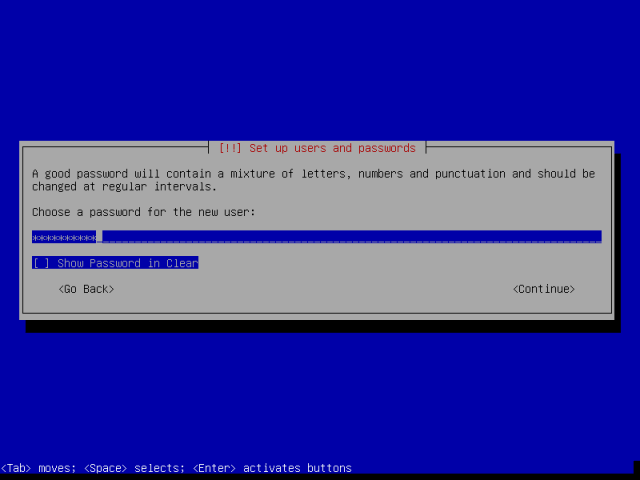
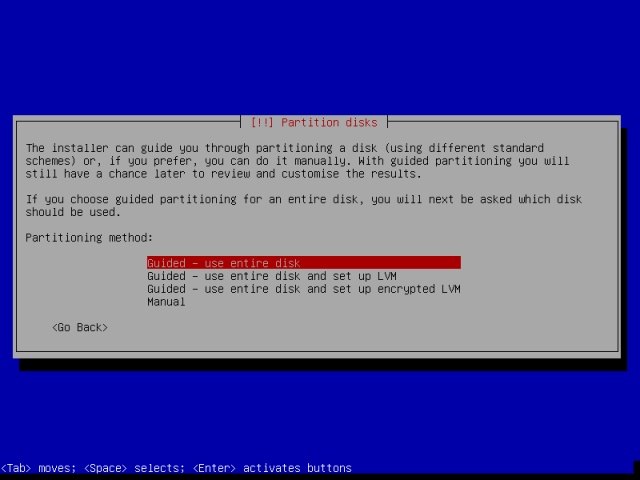
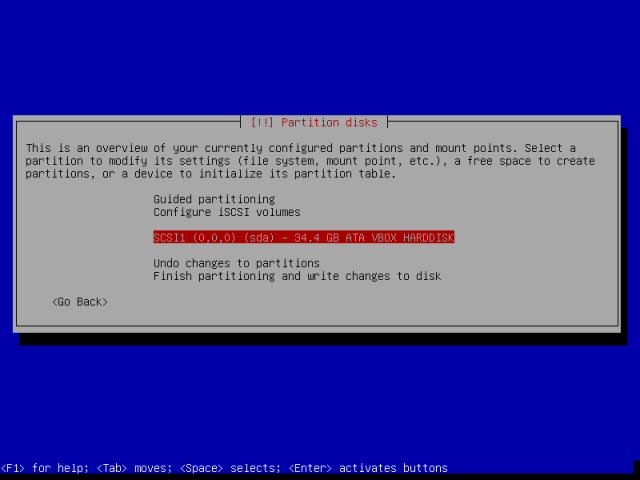
1.KALI LINUX

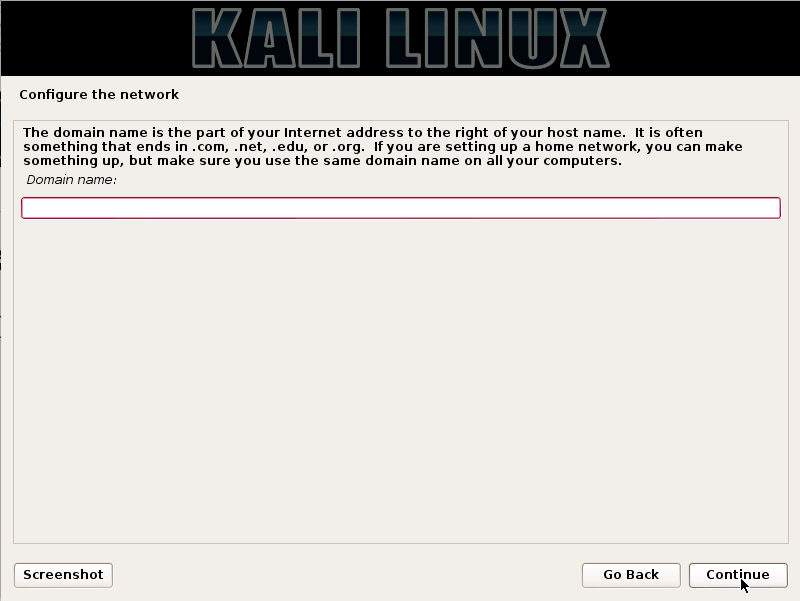
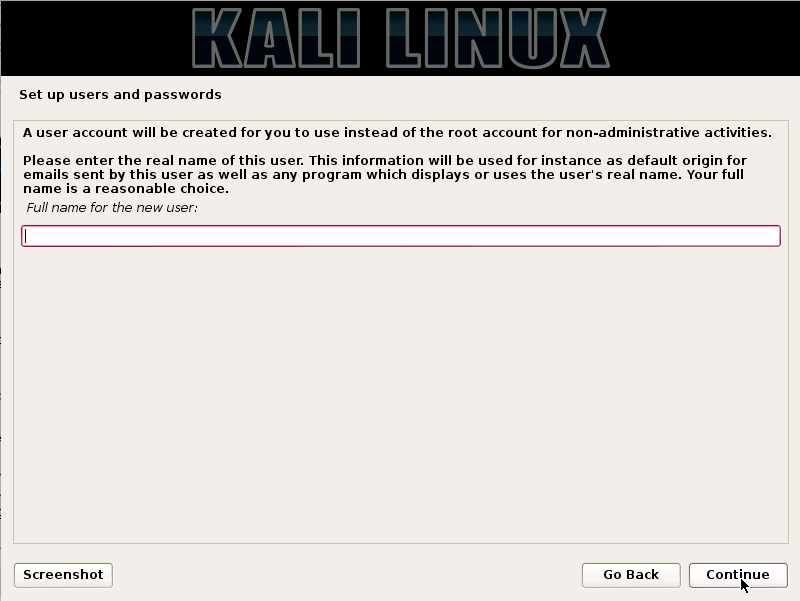
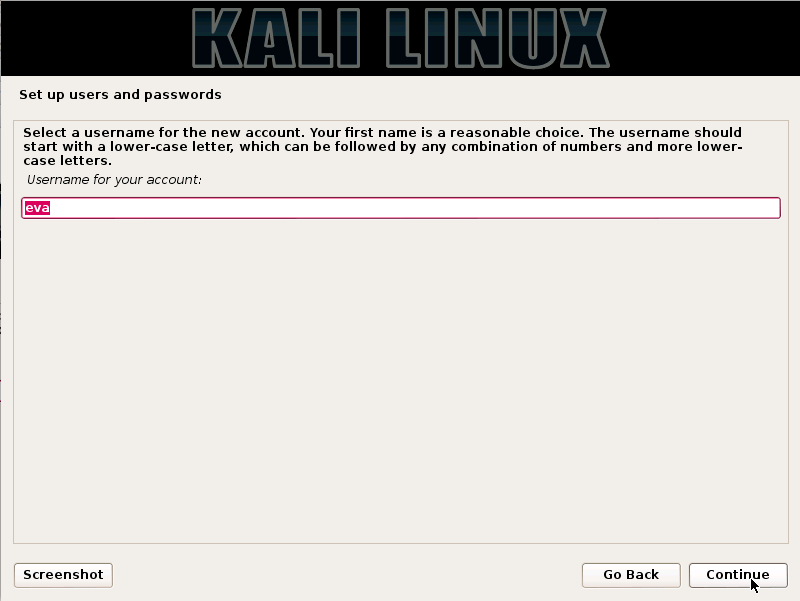
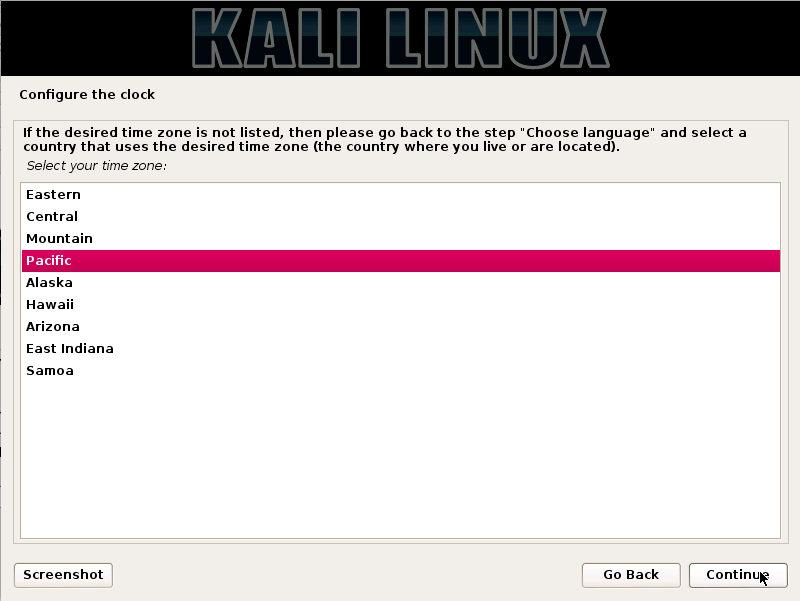
Kali Linux is based on the Debian-Linux distribution, and is especially designed for digital forensics and penetration testing. 
It is maintained and updated on a regular basis by Offensive Security Ltd, under the leadership of Mati Aharoni, Devon Kearns and Raphael Hertzog who are core developers. https://www.kali.org/downloads/
Kali comes pre-installed with more than 300 penetration testing programs and can be installed as a primary operating system on the hard disk, live CD/USB and can even run as a virtual machine using some virtualisation software.


2.BackBox

BackBox is an Ubuntu-based Linux distribution aimed at assisting ethical hackers and penetration testers in security assessments. BackBox OS is designed with the objective of being faster, easily operable and having a minimal desktop environment. The key advantage of BackBox is that its own software repositories are updated at regular intervals to keep the distribution stable and popular for real-world operations. https://www.backbox.org/download/

The BackBox distribution consists of more than 70 tools for tasks ranging from Web analysis and network analysis to stress testing, sniffing, vulnerability assessment, forensics and exploitation.

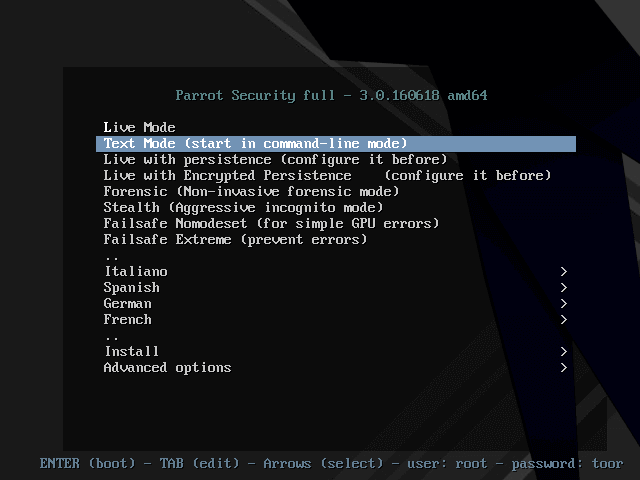
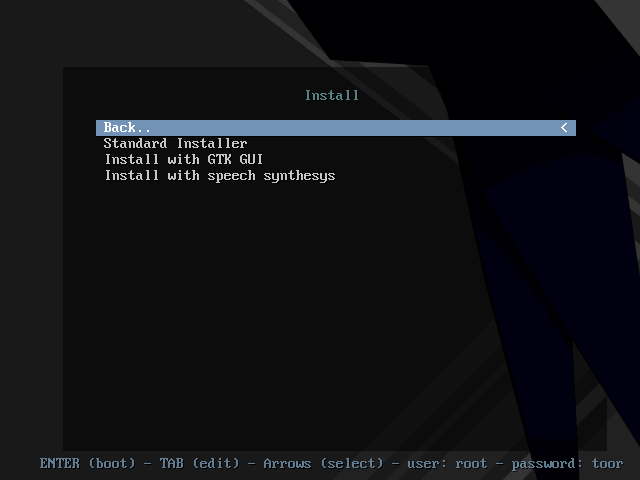
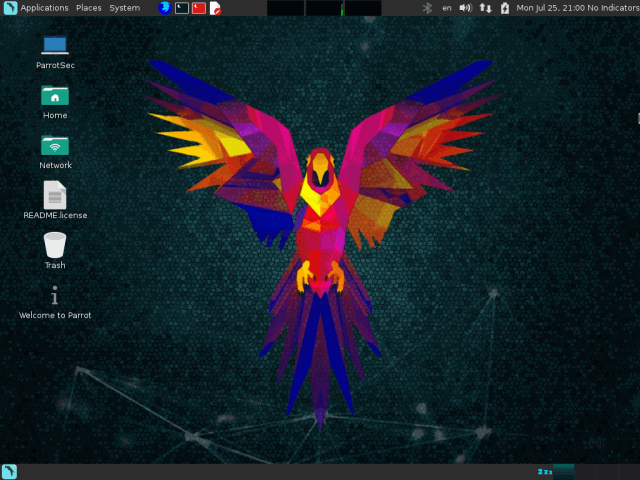
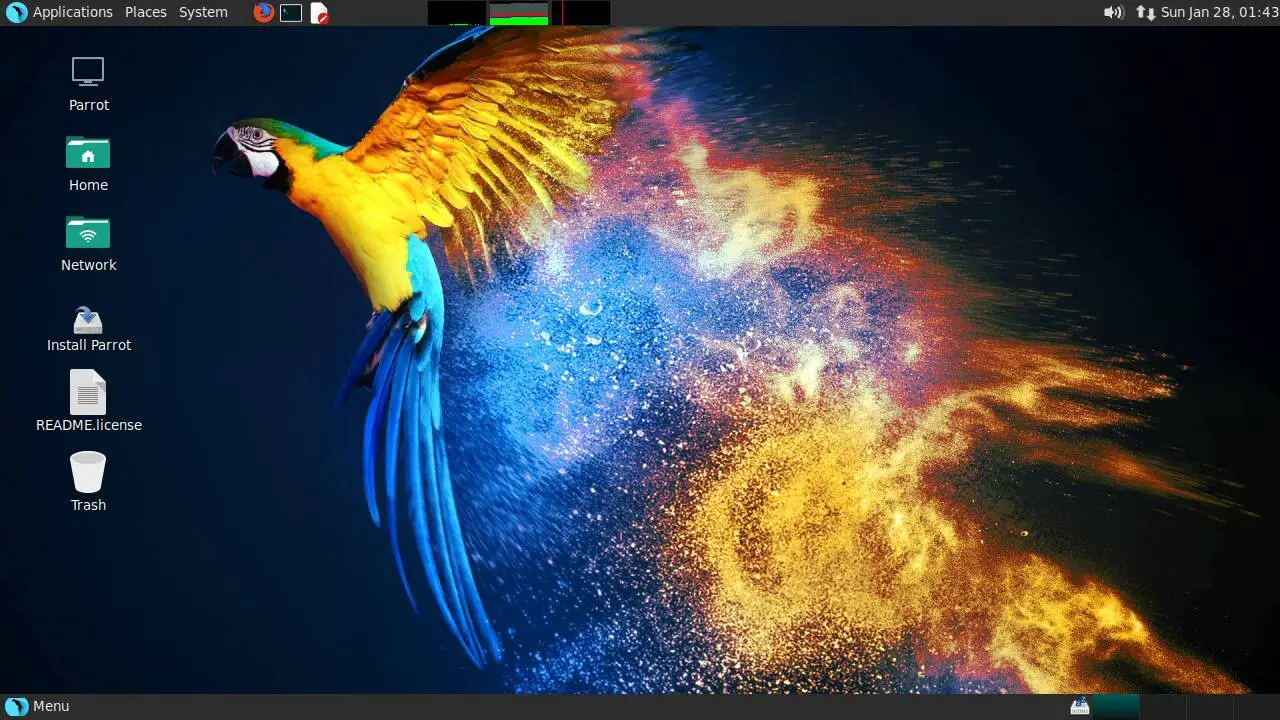
3. PARROT SECURITY OPERATING SYSTEM

Parrot Security OS is based on Debian GNU/Linux combined with the Frozenbox OS and Kali Linux to provide ethical hackers the best-in-class experience of penetration and security testing in real-world environments. It is also designed to provide vulnerability assessment and mitigation, computer forensics and anonymous Web browsing, by the Frozenbox team.

Parrot Security OS makes use of Kali repositories for all sorts of package updates and to integrate new tools. It makes use of the MATE desktop environment using the LightDM display manager to provide an easy-to-use GUI and lightweight environment for computer system analysts to perform all sorts of forensics, vulnerability assessment and cryptography. This OS is known for being highly customisable and for its strong community support.

for download .. https://parrotsec.org/download/

Equipped with the highly customisable kernel version 4.5, it is currently under rolling release upgrade line and based on Debian 9.Has custom anti-forensic tools, interfaces for GPG, Cryptsetup, and support for LUKS, Truecrypt and VeraCrypt.

It supports FALCON 1.0 programming language, multiple compilers, debuggers and the Qt5 and .NET/mono frameworks.Supports Anonsurf including anonymisation of the entire OS, TOR, I2P anonymous networks and beyond.

A special edition of Parrot Cloud, designed for servers, comprises lightweight Parrot OS distributions without graphics, wireless and forensics tools, and acts as a VPS or dedicated server with only useful security tools.

4. DEFT LINUX

DEFT (Digital Evidence and Forensics Toolkit) is based on GNU Linux and DART (Digital Advanced Response Toolkit), a forensics system comprising some of the best tools for forensics and incident response. DEFT Linux is especially designed for carrying out forensics tasks and runs live on systems without tampering with the hard disk or any other storage media. http://www.deftlinux.net/ 

It consists of more than 100 highly-rated forensics and hacking tools.It is currently developed and maintained by Stefano Fratepietro along with other developers, and is available free of charge. It is used actively by ethical hackers, pen testers, government officers, IT auditors and even the military for carrying out various forensics based systems analysis.

cyclone | CJ Julius

It is based on the Lubuntu distribution comprising open source digital forensics and penetration testing tools http://iso.linuxquestions.org/deft-linux/

Full support for Bitlocker encrypted disks, Android and iOS 7.1 logical acquisitions.Consists of Digital Forensics Framework 1.3.

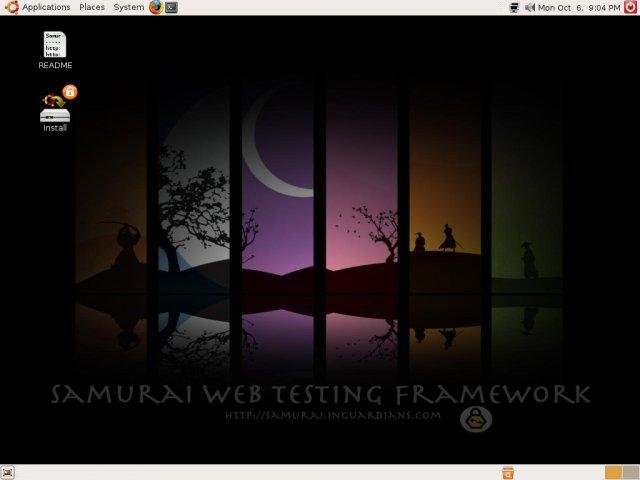
5. SAMURAI WEB TESTING FRAMEWORK

Samurai Web Testing Framework primarily focuses on testing the security of Web applications and comprises lots of Web assessment and exploitation tools. The credit for developing the Samurai Web Testing Framework goes to Kevin Johnson, Justin Searle and Frank DiMaggio. The Samurai Framework provides ethical hackers and pen testers with a live Linux environment that is preconfigured to run as a virtual machine to perform Web penetration testing. http://www.samurai-wtf.org/

The Samurai Web Testing Framework includes popular testing tools like Fierce Domain Scanner and Maltego for Reconnaissance, WebScarab and Ratproxy for mapping, w3af and Burp for discovery, and BeEF and AJAXShell for exploitation.

Samurai download | SourceForge.net

The framework is based on Ubuntu 9.04, is fully open source and receives regular updates with regard to products.Contains many tools for reconnaissance, mapping, discovery and exploitation, especially focusing on Web penetration testing.Equipped with SVN to provide updated security tools, and syncs with active development tools.

How to install kali linux operating system step by step process

INSTALLATION PREREQUISITES

  • We will require at least 20 GB disk space to install Kali Linux.
  • We will need a RAM for systems using i386 and amd64 architectures, with at least 1GB of RAM, but it is recommended to have 2GB of RAM or more.
  • Our system will need to have a CD-DVD Drive support or a USB boot support

STEP 1: BOOT SCREEN

To start the installation, boot the system with either CD or USB, whichever installation medium we have chosen. We will be greeted with the Kali Linux boot screen. Here we can choose either Graphical Install or Text-Mode install. https://www.kali.org/downloads/

Graphical install

STEP 2: SELECT A LANGUAGE

Select the preferred language on the next screen and click on the Continue button.

Language

STEP 3: SELECT YOUR LOCATION

The next step will be specifying our geographic location. We then click on the Continue button.

geographic location

STEP 4: CONFIGURE THE NETWORK – ENTER HOSTNAME

In this step, the image is copied to our hard disk, our network interfaces are probed, and then we are prompted to enter a hostname for the system. Click on the continue button after entering the hostname.

In our example, we have taken “kali” as our hostname.

Kali Linux - Host Name

STEP 5: CONFIGURE THE NETWORK – ENTER THE DOMAIN NAME

Optionally, we can also provide a domain name for our system to be able to use by default.

Kali Linux - domain name

STEP 6: SETUP USER ACCOUNT

In the next step, we will need to provide a username for setting up the user account. The full name of the user is a reasonable choice for this field.

user account

STEP 7: SETUP USER ID

Based on the username provided in the previous step, a default user ID will be created. We can change this later from the settings if we like.

default user ID

STEP 8: CONFIGURE THE CLOCK

Then, we will set our time zone in this step.

time zone

STEP 9: PARTITIONING METHOD

In this step, the installer will review and analyze our disks and offer us four choices, as shown in the below screenshot.

For our example, we will be using the entire disk, hence we will choose the first option.

The second and third option will require us to configure LVM (logical volume manager) and the fourth option, Manual, can be used by experienced users for manual partitioning providing them with more granular configuration options.

Partitioning Method

STEP 10: PARTITION DISKS

After selecting our Partitioning method, we need to select the disk to be partitioned.

Kali Linux - Partition Disks

STEP 11: PARTITIONING SCHEME

Based on our needs, we can either keep all the directories in a single disk or choose to have distinct partitions for the directories. If we are not sure about the options, it is safest to go with the option “All files in one partition”.

Kali Linux - Partitioning Scheme

STEP 12: REVIEW CHANGES

This is the review page, where we can analyze the options we have selected and check for one last time if all our configuration changes are correct because once we click on Continue, the installer will get to work and irreversible changes will be made. Here we will have almost finished our installation, as the major steps are done.

Kali Linux - Review Changes

STEP 13: CONFIGURE THE PACKAGE MANAGER

In this step, we will configure network mirrors and we will need to enter proxy information if any, as needed.

NOTE: Choosing No on this screen, will not allow us to install packages from Kali repositories

Kali Linux - Package Manager

STEP 14: INSTALL GRUB

In this step, we will be prompted to install GRUB.

Kali Linux - install GRUB

STEP 15: KALI INSTALLATION

Finally, we have completed the Kali installation. Click on the Continue button to reboot the system into Kali installation.

Kali Linux installation

Now that we have accomplished installing Kali Linux, it is time to sit back and enjoy our new distribution! User Forums can always be used to get more help during and post-installation.

how to install parrot os step by step tutorials

1.After downloading the ISO image, make a bootable media (DVD/USB flash), when you have successfully created a bootable media, insert it into a functioning DVD-drive or USB-port, then boot into it. You should be able to view the screen below. https://parrotsec.org/download/

Using the Down Arrow, scroll down to the “Install” option and hit Enter:

Parrot OS Boot Menu

2. You should be at the screen below, where you can choose the type of installer to use. In this case, we shall use the “Standard Installer”, therefore, scroll down to it and hit Enter.

Select Parrot OS Installer

3. Then, select the language you will use for the installation from the next screen and press Enter.

Select Parrot OS Installation Language

4. In the interface below, you are required to select your current location, simply scroll down and choose your country from the list.

Select Your Country Location

In case you do not see it, move to “other”, you will then view all the continents in the world. Select the appropriate continent and followed by your country, press Enter.

5. Then, configure the system locales, that is in case the country and language combination you selected have no defined locales. Do that in the following screen and hit Enter.

Configure Your Country Locales

6. Thereafter, configure the keyboard by choosing the keymap to use and press Enter.

Configure System Keyboard

7. You will see the screen below, which indicates additional components are being loaded.

Loading Additional Components

8. On the next screen, setup user and password. From the interface below, enter a root use password and hit Enter.

Set User Root Password

9. Next, setup a user account. Firstly, enter the full name for the user in the screen below and subsequently, set the username and password as well in the next screens, then press Enter to advance.

Set System Username

10. After setting username and password, at this point, you should be at the “Partition disks” screen below. From here, move down to the “Manual” option and hit Enter to advance.

Partitioning a Disk

11. Next, you will view a list of the current disk partitions on your harddisk from the interface below. Select the disk partition, which in my case is the 34.4 GB ATA VBOX HARDDISK, by scrolling to highlight it and continue by pressing Enter.

Select Disk to Partition

Note: In case you have selected an entire disk to partition, you will be prompted as below, choose <Yes> to create a new empty partition table and continue.

Select Disk to Partition

12. Now, select the free space created and advance to further instructions.

Select Free Space Created

13. Go on to select how to use the new empty space, choose “Create a new partition” and proceed by pressing Enter.

Create a New Partition

14. Now create a root partition with 30GB size and hit Enter to create it.

Create Root Partition

Then, make the root partition primary as in the interface below and proceed to the next stage.

Make Root Partition Primary

Thereafter, also set the root partition to be created at the beginning of the available free space and press Enter to continue.

Make Root Partition Beginning

Now you can view the interface below, which displays the root partition settings. Remember that the file system type (Ext4) is selected automatically, to use another file system type, simply hit Enter on “Use as” and select the file system type you want to use for the root partition.

Then scroll down to “Done setting up the partition” and continue by pressing Enter.

Root Partition Summary

15. Next, you need to create a swap area, it is a portion of the hard disk space which temporarily holds data from the system RAM that is not currently scheduled to be worked on, by the CPU.

You can create a swap area of size twice as your RAM, for my case I will use the free space left. Therefore, move down to highlight the free space/partition and press Enter.

Select Free Space to Create Swap

You will view the create a new partition interface, select “Create a new partition” option and proceed by pressing Enter.

Create a New Partition

Enter the Swap area size, make it a logical partition and proceed to the next step by pressing Enter.

Set Swap Size

Then select “Use as” and press Enter again.

Create Swap Partition

Choose “Swap area” from the interface below, hit Enter to advance.

Select Swap Area

Finish creating the Swap area by scrolling down to “Done setting up the partition” and press Enter.

Swap Partition Created

16. When you have created all the partitions, you will be at the screen below. Move down to “Finish partitioning and write changes to disk”, then hit Enter to proceed.

All Partition Summary

Select <Yes> to accept and write changes to disk and then advance by pressing Enter button.

Write Changes to Disk

Write Changes to Disk

17. At this point, the system files will be copied to disk and installed, depending on your system specifications, it will take a few minutes.

Installing Parrot OS

Installing Parrot OS

18. At a certain point, you will be asked to choose the disk in which the Grub bootloader will be installed. Select the primary harddisk and press Enter to continue and Yes to confirm on the next screen to finish the installation.

Parrot OS Installation Completed

19. In the screen below, hit enter to finish the installation process. But the system will not reboot immediately, some packages will be removed from the disk, until that is done, the system will then reboot, remove the installation media and you will view the Grub boot loader menu.

Parrot OS Login Screen

20. At the login prompt, enter your username and password to login.

Parrot OS Login Screen

Parrot OS Desktop